Chocolate & Spice

chocolate, spice and the other pleasures in life

Thursday, December 14, 2006

Clearing out the fridge isn't easy!!

I read once here about a certain food blogger's difficulty in finishing up his lasagne sheets. With just a week to go before we leave Melbourne for good after our 6 months here, I am faced with the same problem with the dates still lurking in my fridge after 2 rounds of Sticky Toffee Puddings and my attempt at Date Scones the other day. And what I have left isn't quite enough for another pudding for the Christmas gathering at Allan's folks next week in Sydney and I don't fancy making anymore goodies to stuff our face with this week!! *SCREAM*


With all the boxes and bags we have to load the car with next Saturday when we leave for Sydney, I'm sure we'll find room for yet another small bag but it vexes me no end that I can't seem to finish these dates. It's no solution telling me to eat them plain (as I hate the taste of plain dates if not masked with other flavours) - that'll be A's job.

Back to Date Scones. It's a simple recipe, perfect for Saturday morning brekkies when it's pulled out fresh and steaming hot from the oven. Alright, who are we kidding here? No one I know who reads this blog gets up early on Saturday, much less to bake! But honestly, if you do happen to have any leftover dates in the fridge, set the alarm clock and give this recipe a go. Although these scones keep relatively well, they are definitely best fresh and hot, with the aroma of sweet dates mingling with the freshly ground nutmeg. I had one smothered with butter as soon as it came out of the oven and it was oh so yummy....


This recipe comes from Stephanie Alexander's lovely cook book, The Cook's Companion.

Date Scones
(makes about 10 - 11)

Ingredients
:

150g self-raising flour
1/2 tsp freshly grated nutmeg (this is essential, do not skip!)
pinch of salt
20g unsalted butter
2 tbsp sugar
150g dates, stoned and chopped
1/4 cup milk
1/4 cup water

Method
:

1. Preheat oven to 210'C and grease a baking tray.
2. Sift flour, nutmeg and salt together, then rub in butter. Add sugar and dates.
3. Combine milk and water and mix into flour to form a soft but firm dough. Knead together quickly, then press out on a floured surface and cut into squares or use a cutter to cut out rounds.
4. Bake for 7 minutes then reduce heat to 180'C and cook for a further 8 minutes until golden.

Labels: , , ,

Tuesday, December 12, 2006

Pie for a Guy

Perhaps this is too much of a generalisation but I've rarely met a guy who doesn't like pies/tarts or anything with pastry in it. There's probably something about the combination of crusty pastry and oozing filling that makes for a sublime 'party in your mouth' (I got this off one of the celebrity chefs, Jason Roberts, on ReadySteadyCook...yes one of those cooking programmes I catch over here).


A, being a true Aussie at heart, loves pies much to my horror ("Sweetie, there's a ton of FAT in that meat pie you're chowing down..."). I'm not a big fan of pastry, both making it or eating it. Making it - it always seems that the weather in Singapore is never condusive to making it although my efforts here have met more success. Eating it - I find that most commercial pies have way too much pastry, making for a tough chewing experience and thenafter, sitting like a lump of lard in your tummy.

I've always wished I had a light hand with pastry; so do most cooks I know. I recall back in school days, my classmates in the cooking class would shudder with horror when we learnt that the lesson for that day was "Sausage Rolls" or "Strawberry Pie" or anything related to pastry. These days, I've taken a more relaxed approach to making pastry instead of stressing over getting the dough to bind and find that this seems to be the best way to making a successful pie! Probably because one doesn't handle the dough as much!

Looking back on my posts, I've done a whole gamut of cakes, biscuits and the likes but very little pastry of late. So I thought it was time to change that and set aside an afternoon to make a Roast Tomato, Bacon and Spinach Tart, one of my preferred choices at cafes I frequent. Made well, this tart will be a nice light lunch for hot afternoons when you don't feel like cooking! This is a slight modification from the recipe in one of my reliable cookbooks, Everyday Cooking.


Roast Tomato, Bacon and Spinach Tart (serves 8)

Ingredients
:

1 x 25cm Shortcrust pastry shell (using your own recipe or ready-made)
4 Roma tomatoes
oil
salt and freshly ground black pepper
1 tsp chilli powder (optional)
1 onion, diced
6 bacon slices, diced
4 eggs
125ml (1/2 cup) cream
3 tbsp grated parmigiano
chopped parsley
80g spinach, blanched and chopped
pinch of freshly grated nutmeg, sprinkled over the cooked spinach

Method
:
1. Preheat oven to 180'C.
2. Cut the tomatoes into wedges and place on a baking tray. Brush with oil and sprinkle with salt, pepper and chilli (if using). Roast in a preheated oven for 20 - 30 minutes until the tomatoes are soft and golden brown.
3. Heat a small saucepan over a medium heat. Add a generous splash of oil, the onion and bacon. Cook for 5-6 minutes, stirring often to prevent the bacon from catching.
4. Whisk the eggs together with the cream, grated parmigiano, parsley, spinach and salt and pepper.
5. Arrange the tomato wedges in the base of the cooked pastry shell, add the onion and pancetta mix and pour in the egg custard.
6. Bake in the preheated oven for 30-40 minutes, or until the egg custard is set.

Some comments:
  • The shortcrust pastry should be blind-baked before the fillings are added. To prevent the egg custard from seeping into the pastry and toughening it, brush the shortcrust pastry with egg yolk before blind baking to seal. This may be repeated once during the baking process.
  • You'll probably have pastry left over, as with the fillings. Don't waste them - make mini tartlets by using a muffin pan as your base instead!

Labels: , ,

Friday, November 10, 2006

One Day in the Life of a Domestic Goddess (wannabe)

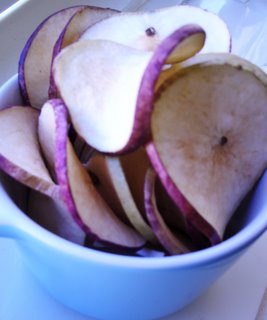
Apple chips from The Nut Spot

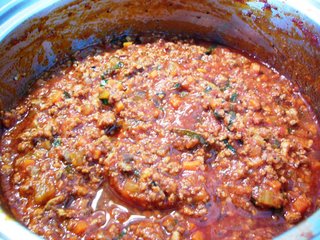
Today is yet another day I thank my lucky stars that I had this opportunity to take time off from the neverending whirl of working life. My time being my own nowadays, a lot of it is spent in the kitchen getting reacquainted with my old lost cooking skills….and as friends now like to note, living out my (secret) fantasy of being a domestic goddess. It's mid afternoon now as I write this, with a bowl of fresh apple chips from The Nut Shot for company, while my ragu sauce bubbles gently away on the stove. What ragu sauce you ask? Well, the ragu sauce I made from scratch just this morning.

In my past hectic life (soon to resume in a not-too-distant January), our fridge used to be a barren landscape of stale bread, milk, an assortment of unexciting jams, butter flecked with bread crumbs, the odd egg or two and usually the remnants of some manky bananas A intended to finish but plain forgot. Packets of frozen vegetables and occasionally, an unidentifiable mess from the back of the freezer complete the picture of our disorganised fridge. I'd throw everything out and troop to the supermarket with best intentions to ensure that both of us enjoy some proper nourishment. The cycle repeats itself every couple of months until I'm reduced to just buying essentials for 1 or 2 home-cooked meals on weekends, and throwing any remaining herbs, vegetable scraps away.

I recall numerous times when I'd open the door and survey the debris inside and despair of the day when I would find the time to ensure that my fridge would always be adequately stocked with pristinely organized foodstuff and fresh produce. Like any woman and her dream wedding, I have a dream fridge. Amongst all the usual fresh produce like eggs, meat, vegetables and fruits, my dream fridge would also have huge compartments to store my condiments, jams and preserves and contain tubs of frozen ragu sauce (for an instant meal), freshly made chicken stock, ice-cubes of frozen herbs (instead of the green sludge mouldering in the vegetable compartment), homemade cookies and cakes to snack on, lots of fresh fruit and bread.


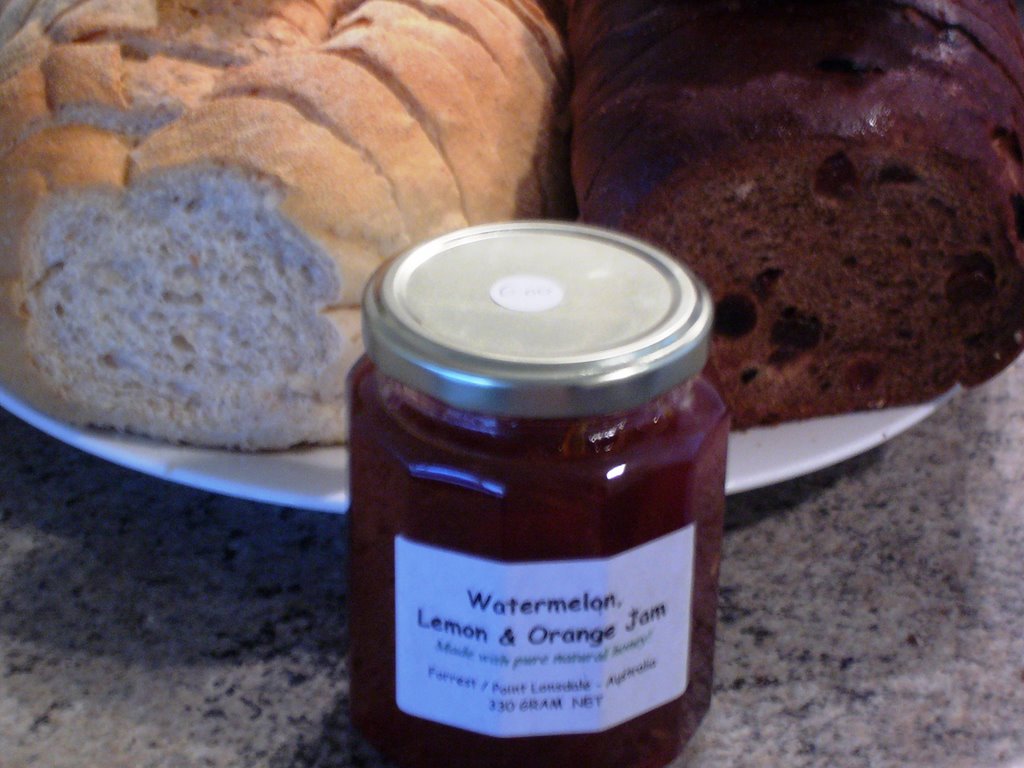
Some of the new additions to my fridge from our recent trip down the Great Ocean
Road - Sourdough (L) and Scottish malt bread (R) from Cobb's Old Style Bakery in Port
Fairy and Watermelon, Lemon & Orange Jam from a market stall in Apollo Bay's farmers' market

Today sees the culmination of several weeks of organized behaviour on my part. Coming across artisanal fresh bread on our last day in Port Fairy (one stop in our trip to the Great Ocean Road), I promptly purchase 2 fat loaves of sourdough and Scottish malt bread from Cobb's Old Style Bakery. A day before that, I'd spotted jars of watermelon, lemon and orange honey jam (an unusual but yummy combination) using fresh honey from a local producer and bought a couple as well. And today, I finally set aside the whole day to make ragu and freeze all my excess herbs. So save for freshly made chicken stock, my fridge is now beginning to resemble my vision of a dream fridge.

For a while, I'd procrastinated on making ragu although it's actually a very simple exercise, as I had an idea that the preparation time involved would simply kill me. However, I'm faced with a leftover ½ bottle of wine (too old to drink), celery and carrots fast approaching its use-by date and decide to bite the bullet. Getting started, it's definitely quite tedious preparing all the ingredients (especially mincing the carrots!!) but once it's on the stove and simmering away, you have 4 hours of uninterrupted bliss.
My ragu recipe combines the best bits of 2 recipes – one from a lawyer friend who apprenticed as a chef on his year out from practice (and does indeed cook some spectacular meals!) and the other from Delia Smith.

Definitely set aside a whole day without interruptions for making ragu. After simmering gently for 4 hours, it's mid to late afternoon if you start first thing in the morning and the ragu has to cool completely before you divide it into separate bags for freezing.

My Ragu Bolognese
(Makes approximately 8 x 225g portions, each portion serving 2 people)

Ingredients:

550g minced beef (I prefer topside mince to lean meat for the extra flavoursome fat)
450g minced pork
225g chicken livers (deveined, green bits cut out and finely chopped)
3 medium-sized white onions, finely diced
8 fat garlic close, chopped
2 carrots, finely diced
2 sticks of celery (fibrous skin removed with a peeler and finely diced)
100g streaky bacon (finely chopped)
2 x 400g tins Italian chopped/whole tomatoes
400g tomato puree/paste
375ml (or ½ bottle) red wine (I used Australian shiraz for its rich and fruity overtones)
Fresh basil, as much as you'd like
3-5 bay leaves
¾ - 1 whole nutmeg, freshly grated
Sea salt and freshly milled black pepper

Method:

(1) Mix the minced meats with 1/3 cup of olive oil, 3 cloves of the chopped garlic and lots of freshly milled black pepper and leave aside while you prepare the rest of the other ingredients.

(2) Take the largest frying pan you have and heat 3 tablespoons of olive oil over high heat. Add the minced meat and brown it, breaking it up and moving it around in the pan. It is probably more manageable if you add the meat a little at a time. When the meat is browned, tip it into a standing flameproof casserole with at least a 3.5l capacity**.

(3) Add more oil and brown the pieces of chicken liver. Add this to the casserole.

(4) Gently fry the onion and remaining garlic over a medium heat for about 10 minutes, moving it around from time to time. When the onion and garlic have softened and turned slightly translucent (about 10 minutes on medium heat), add the bacon and continue cooking for a further 5 minutes.

(5) Now add the diced carrot and celery and fry till soft. If using the casserole, tip all this into the casserole.

(6) Add the contents of the tins of tomatoes, the tomato paste/puree, red wine and a really good seasoning of pepper and nutmeg but no salt yet. Allow this to come up to simmering point. Then strip the leaves from the basil, chop them very finely and add them to the pot.

(7) As soon as everything is simmering, place the casserole on the centre shelf of the oven and leave it to cook slowly, without a lid, for 4 hours. It's a good idea to have a look after 3 hours to make sure all is well, but what you should end up with is a thick concentrated sauce with only a trace of liquid left in it. Once done, remove it from the oven, add a generous scattering of salt, taste to check the seasoning and adjust if necessary. Strip the leaves off the remaining basil, slice finely and stir them in.

** You can also make do with a large heavy-bottomed pot over the stove. At step 4, fry the onion and garlic in the pot instead, and continue the rest of the recipe, except that the meat should be tipped into the pot at step 5 before adding the rest of the ingredients.

Some comments:

I prefer not to salt dishes early on in the cooking process so that I can taste the final flavours to determine how much salt is really required. Heart-smart move! Also, the original Delia Smith recipe called for just ½ whole nutmeg to be grated but with the increased quantities of meat and sauce in this recipe, I increased the amount of nutmeg in proportion.

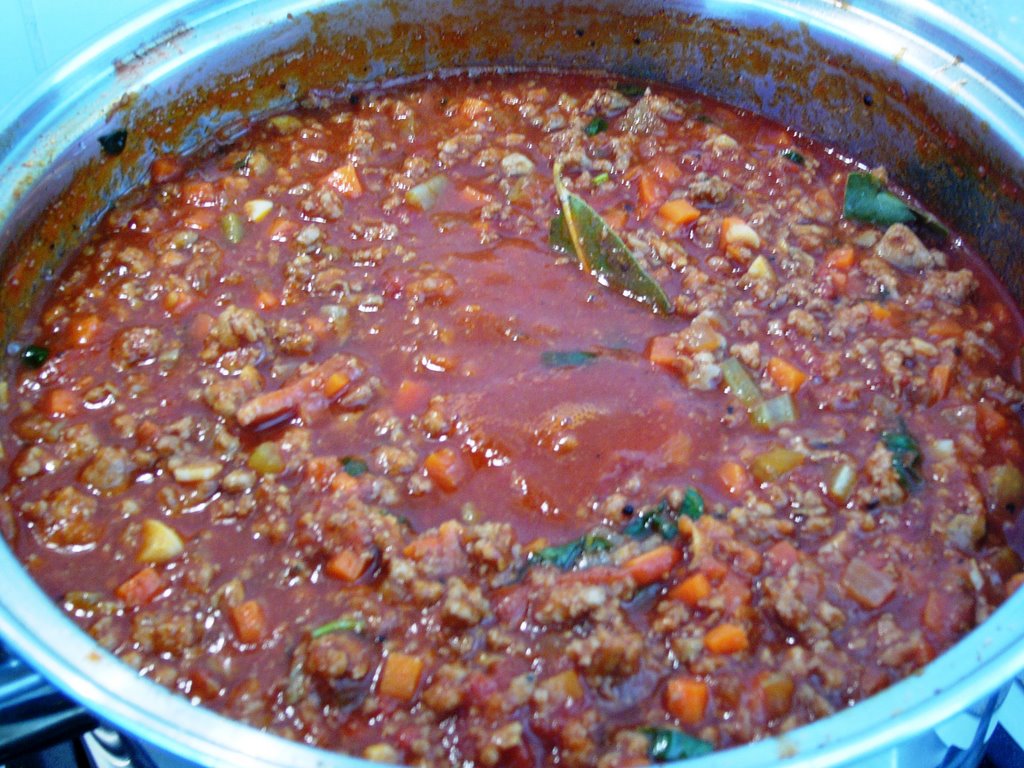
Starting off with all the prepped ingredients


Setting the ragu to simmer for 4 hours

Midway through the 4 hours simmering process

The end result!

Where I shopped:

The Nut Spot

1c Murphy Street
South Yarra Melbourne
Tel: 9820 9994

Well-stocked with all kinds of nuts, dried fruits and fruit chips. I am glad I don't have to walk miles to get pistachios or walnuts for cakes now!

Cobb's Old Style Bakery

25 Bank Street
Port Fairy, Victoria
Tel: (03) 5568 1713

For a magnificent sticky-sweet Scottish malt loaf and lots of old-fashioned pasties and cakes made the way your grandma does hers.

Labels: , ,

Tuesday, October 31, 2006

When you have no time for dinner...

Today, I'm in the midst of drafting minutes for the various meetings I attended last week when the batteries in my digital recorder go flat. Hmm, seemed like a good time as any time to take a walk down to neighbouring Windsor to buy some spices for a new dish I wanted to make for dinner tonight as a treat for A, who's been busy burning the midnight and early morning oil these couple of weeks.

I decide to take the rest of the afternoon off from work to check out a couple of new shops (one is structured much like the Heeren in showcasing up and coming young Melburnian designers), buy some art supplies for my resin jewellery class on Thursday and gather supplies for tonight's dinner and baking sessions for the rest of the week.

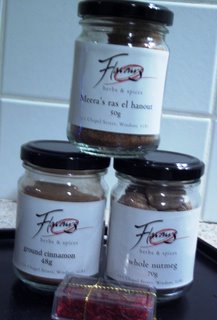
I wander down to a now favourite haunt along Chapel Street called Flavours, Herbs and Spices, which stocks a veritable Aladdin's cave of spices, herbs and spice mixes as well as a host of enticing kitchenware, supplies and linen for the perfect hostess. I'm looking for a Moroccan spice mix, ras-el-hanout, as well as ordinary spices such as ground cinnamon, saffron and nutmeg. FHS' owner, Victoria, suggests "Meera's ras-el-hanout", compounded and mixed specially for local Melburnian chef/culinary teacher, Meera Freeman (who's well known for her Moroccan cooking classes), which comprises a ground mix of cinnamon, cardamom, cassia, allspice, nutmeg, turmeric, long, cubeb and black pepper, coriander, mace, grains of paradise (what is this?) rosebuds and ginger. I quickly spot the rest of the spices I came for and leave with a nice bag of goodies before I start poking around Victoria's lovely shop and buy yet another linen towel/apron from the Mozi range.
My buys from Flavours Herbs Spices

Having the afternoon off also means that I'm like a loony woman back home trying to unpack my stuff in the kitchen, defrost the chicken parts and check my BlackBerry to see if I've received any emails from the office. Darn… the first set of minutes have been formatted and I've got comments on my second set of minutes so it's another couple of hours taking care of everything before I surface to see that it's 815pm!

Time to get on with the spiced chicken with the ras-el-hanout mix and tomato and carrot couscous! Tonight sees a couple of firsts - the first time I'm working with cous cous and the first time I'm doing anything vaguely Moroccan. For some reason, I've never tried Moroccan cooking or even making cous cous although most of their dishes seems easy enough with all that stewing going on. Maybe it was the use of apricots in their dishes which grossed me out a little - me and my compartmentalised taste buds where savoury dishes should be savoury, spicy dishes apropos but a savoury dish with fruity twinges does send a little shiver down my spine. Strangely I don't mind this combination when it comes to pate & terrines though!

Anyway, since I've always been avowedly (as is my Italiano-phile and Franco-phile girlfriend, T) pro-Italian cuisine to date, I've sadly neglected trying dishes from the other side of the Mediterranean. By the end of the evening, I'm wondering why I haven't gone out and purchased a tagine before - cous cous and Moroccan food isn't so difficult and it's definitely tasty! (Alright so maybe my spiced chicken isn't really a Moroccan dish but I used a Moroccan spice mix!)


Tonight's dinner is an exercise in simplicity and makes an appearance in time for A's return around 9pm.


Spiced Chicken

I decide I want crispy chicken for tonight instead of making a stew (too much time!). Toss chicken parts in a plastic bag holding 4 tablespoons of plain flour mixed with 2 tablespoons of ras-el-hanout and a couple of pinches of salt. Once the chicken parts are evenly floured, bung them into a preheated oven of 220'C to crisp the skin for 10 minutes and then lower the temperature to 190'C for about 15 more minutes. Squeeze a lemon over and it's ready to go.

Cous cous

Prepare cous cous enough for 2 persons according to the instructions on the package. Fluff the grains with a fork and toss in a cube of butter and reheat over low heat for 1 minute. Add a handful of shredded carrots, diced tomatoes, the juice of 1 lemon, finely chopped parsley and coriander and some ground black pepper and mix well. Uunfortunately, with the amount I had to carry today, I had completely forgotten to get the coriander and parsley.

**You won't believe the appetizing smells emanating from the spiced chicken when its had its blast in the oven! It looks a little like Colonel Sander's Original Recipe but tastes way way waaaaaayyyyy better. Taking no longer than 45 minutes (prep and cooking time), tonight's dinner is perfect for those nights when you don't have a lot of time to whip up something fancy and yet want something healthy, light but filling.

Labels: , , ,