Chocolate & Spice

chocolate, spice and the other pleasures in life

Thursday, December 14, 2006

Clearing out the fridge isn't easy!!

I read once here about a certain food blogger's difficulty in finishing up his lasagne sheets. With just a week to go before we leave Melbourne for good after our 6 months here, I am faced with the same problem with the dates still lurking in my fridge after 2 rounds of Sticky Toffee Puddings and my attempt at Date Scones the other day. And what I have left isn't quite enough for another pudding for the Christmas gathering at Allan's folks next week in Sydney and I don't fancy making anymore goodies to stuff our face with this week!! *SCREAM*


With all the boxes and bags we have to load the car with next Saturday when we leave for Sydney, I'm sure we'll find room for yet another small bag but it vexes me no end that I can't seem to finish these dates. It's no solution telling me to eat them plain (as I hate the taste of plain dates if not masked with other flavours) - that'll be A's job.

Back to Date Scones. It's a simple recipe, perfect for Saturday morning brekkies when it's pulled out fresh and steaming hot from the oven. Alright, who are we kidding here? No one I know who reads this blog gets up early on Saturday, much less to bake! But honestly, if you do happen to have any leftover dates in the fridge, set the alarm clock and give this recipe a go. Although these scones keep relatively well, they are definitely best fresh and hot, with the aroma of sweet dates mingling with the freshly ground nutmeg. I had one smothered with butter as soon as it came out of the oven and it was oh so yummy....


This recipe comes from Stephanie Alexander's lovely cook book, The Cook's Companion.

Date Scones
(makes about 10 - 11)

Ingredients
:

150g self-raising flour
1/2 tsp freshly grated nutmeg (this is essential, do not skip!)
pinch of salt
20g unsalted butter
2 tbsp sugar
150g dates, stoned and chopped
1/4 cup milk
1/4 cup water

Method
:

1. Preheat oven to 210'C and grease a baking tray.
2. Sift flour, nutmeg and salt together, then rub in butter. Add sugar and dates.
3. Combine milk and water and mix into flour to form a soft but firm dough. Knead together quickly, then press out on a floured surface and cut into squares or use a cutter to cut out rounds.
4. Bake for 7 minutes then reduce heat to 180'C and cook for a further 8 minutes until golden.

Labels: , , ,

Tuesday, December 12, 2006

Pie for a Guy

Perhaps this is too much of a generalisation but I've rarely met a guy who doesn't like pies/tarts or anything with pastry in it. There's probably something about the combination of crusty pastry and oozing filling that makes for a sublime 'party in your mouth' (I got this off one of the celebrity chefs, Jason Roberts, on ReadySteadyCook...yes one of those cooking programmes I catch over here).


A, being a true Aussie at heart, loves pies much to my horror ("Sweetie, there's a ton of FAT in that meat pie you're chowing down..."). I'm not a big fan of pastry, both making it or eating it. Making it - it always seems that the weather in Singapore is never condusive to making it although my efforts here have met more success. Eating it - I find that most commercial pies have way too much pastry, making for a tough chewing experience and thenafter, sitting like a lump of lard in your tummy.

I've always wished I had a light hand with pastry; so do most cooks I know. I recall back in school days, my classmates in the cooking class would shudder with horror when we learnt that the lesson for that day was "Sausage Rolls" or "Strawberry Pie" or anything related to pastry. These days, I've taken a more relaxed approach to making pastry instead of stressing over getting the dough to bind and find that this seems to be the best way to making a successful pie! Probably because one doesn't handle the dough as much!

Looking back on my posts, I've done a whole gamut of cakes, biscuits and the likes but very little pastry of late. So I thought it was time to change that and set aside an afternoon to make a Roast Tomato, Bacon and Spinach Tart, one of my preferred choices at cafes I frequent. Made well, this tart will be a nice light lunch for hot afternoons when you don't feel like cooking! This is a slight modification from the recipe in one of my reliable cookbooks, Everyday Cooking.


Roast Tomato, Bacon and Spinach Tart (serves 8)

Ingredients
:

1 x 25cm Shortcrust pastry shell (using your own recipe or ready-made)
4 Roma tomatoes
oil
salt and freshly ground black pepper
1 tsp chilli powder (optional)
1 onion, diced
6 bacon slices, diced
4 eggs
125ml (1/2 cup) cream
3 tbsp grated parmigiano
chopped parsley
80g spinach, blanched and chopped
pinch of freshly grated nutmeg, sprinkled over the cooked spinach

Method
:
1. Preheat oven to 180'C.
2. Cut the tomatoes into wedges and place on a baking tray. Brush with oil and sprinkle with salt, pepper and chilli (if using). Roast in a preheated oven for 20 - 30 minutes until the tomatoes are soft and golden brown.
3. Heat a small saucepan over a medium heat. Add a generous splash of oil, the onion and bacon. Cook for 5-6 minutes, stirring often to prevent the bacon from catching.
4. Whisk the eggs together with the cream, grated parmigiano, parsley, spinach and salt and pepper.
5. Arrange the tomato wedges in the base of the cooked pastry shell, add the onion and pancetta mix and pour in the egg custard.
6. Bake in the preheated oven for 30-40 minutes, or until the egg custard is set.

Some comments:
  • The shortcrust pastry should be blind-baked before the fillings are added. To prevent the egg custard from seeping into the pastry and toughening it, brush the shortcrust pastry with egg yolk before blind baking to seal. This may be repeated once during the baking process.
  • You'll probably have pastry left over, as with the fillings. Don't waste them - make mini tartlets by using a muffin pan as your base instead!

Labels: , ,

Wednesday, December 06, 2006

It's begining to look a lot like Christmas!

I must say that a pudding for dessert isn't the best idea after an indulgent weekend away in Daylesford and eating at the Lake House or when the weather is in the high 30's as its been this week. Still, we're looking at the run-up to Christmas and what better way then to get into the mood with a pre-Christmas pudding! I missed out on getting some beautifully produced puddings from A Pud for All Seasons, both at the Slow Food Market (at the Abbotsford Convent a couple of weekends ago) as well as when we went up country for the weekend and passed by their factory at Elphinstone. So I decided to make my own seeing that I had a bag of dates in the pantry and a recipe flagged for some time to try!

A and I both have a fond weakness for sweet sticky desserts and sticky date pudding happens to be one of our favourites. I've always thought that there was something Christmassy about having a date pudding – with all that lovely caramelized and slightly spicy overtones it connotes!

I thought dates and it's lovely sweet nuances would definitely put us in the mood for all the gift-wrapping after dinner and happily set to making it seeing I had just 16 more days till we leave Melbourne and a whole bag-ful to finish up. Yummy goodness and perfect comfort food, it's perhaps a tad heavy for a summer evening seeing that all the berries and stone fruits have come into season. But making a sticky date pudding is also an exercise in simplicity and will keep nicely in the fridge for those tricky moments between meals when one's tummy craves for a little sustenance.

A is of course thrilled that I have finally decided to make a sticky date pudding and that must have been the reason why he returned earlier than expected with a "Pudding...where's the pudding?" instead of the expected kiss on the cheek!


This recipe comes from a fabulous cookbook, The Cook's Companion, by Melbourne's doyen of cooking, Stephanie Alexander.

Sticky Toffee Pudding
(serves 8)

Ingredients
:
170g dates, stoned and chopped
1 tsp bicarbonate of soda
300ml boiling water
60g unsalted butter
¾ cup castor or brown sugar
2 eggs
170g self-raising flour
½ tsp pure vanilla
** 100g dark chocolate chips/ chopped bittersweet chocolate (optional)

Sauce
400g brown sugar
1 cup thick cream
250g unsalted butter
1 vanilla bean, split

Method
:
1. Preheat oven to 180'C and butter an 18cm square cake tin.
2. Mix dates and bicarbonate of sofa. Pour over water and leave to stand.
3. Cream butter and sugar, then add eggs, one at a time, beating well after each. Fold flour in gently, then stir in date mixture and vanilla and pour into prepared tin.
4. Bake in centre of oven for 30 – 40 minutes until cooked when tested with a sker.
5. To make the sauce, bring all the ingredients to a boil. Reduce heat and simmer for 5 minutes. Remove vanilla bean.
6. Pour a little sauce over warm pudding and return it to oven for 2-3 minutes so sauce soaks in.
7. Cut pudding into squares and pass extra sauce.

Labels: , ,

Saturday, November 25, 2006

What keeps me busy most days

I'm commonly asked (as is A) what I do with my time here now that I'm not working. Initially, keeping myself occupied and filling the hours was a tough task, me waking up promptly at 7:30 am and fidgeting around the house and checking my email every couple of hours. Now, it's a breeze finding activities to do to fill the hours every day!

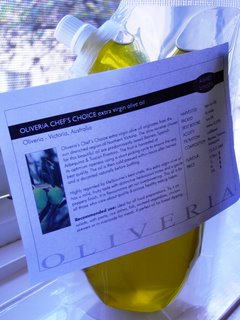
A lot of my friends are now calling me a "domestic goddess", hopefully with the image of the luscious Nigella Lawson in mind! I guess it's because a lot of my time now revolves around cooking and food and shopping for food. I spend many happy hours walking past the swanky boutiques on Chapel Street until I reach its extreme end in the district of Windsor to wallow in the op shops with their extensive collection of vintage cooking books (how quaint are recipes for good old 70s and 80s classics like prawn cocktail, avocado and trout pate with Melba toast and Steak Diane?!) and browsing the shelves at a favourite shop, Flavours Herbs and Spices, for spices, herbs and other cooking equipment. Walking back along Chapel Street, I look at the lovely cakes at Patterson's Cakes, and the many other old-fashioned cake shops (with garishly decorated cupcakes) along the way. Sometimes, I pop to the Prahran Market to check out the produce at the organic supermarket there although by now I do most of my shopping at the cheaper Chinese produce market (the Fresh Supermarket on Chapel Street, Prahran). Other times, I swing by special providores such as Oliveria - a Melbourne institution (particularly amongst chefs) specialising in olive-based products and is best known for its range of olive oils.


I am usually unable to resist buying something new to try and a week back, having run out of olive oil (the normal kind from the supermarkets), I finally decide to try the olive oil sourced by Oliveria from various parts of the world - ranging from Spain, Australia, Italy and even France. These oils are decanted from huge stainless steel buckets into individual packets and because they are packaged under Oliveria's own label, the cost of trying these oils are significantly lowered.

First, one has to decide on the type of olive oil one wants - spicy, fruity, mild.... the various attributes of olive oil is unending. Buying olive oil can be akin to buying wine - you definitely have to try some before deciding. After sampling a variety, I decide on the Chef's Choice olive oil, which I'm told is a popular choice amongst many Melbourne chefs. Later that night, drizzled over a rocket salad and served separately with some of my Tomato Powder (from New York) as a dip for bread, I can see why this olive oil is in demand!

I don't just spend all my time drooling over the produce in specialist shops or a lazy afternoon reading the latest cookbooks at Borders (just a short 10 minute walk away!) or cooking up dinner. For the past couple of months, I've been faithfully tying on the apron and whacking on the oven to try my hand at a variety of bakes - cakes, slices, muffins and biscuits. I'm way past the first time I made pastry after many years, although there are some near misses (like the time I tweaked my Chocolate Peanut Cookie recipe with orange marmalade instead and turned out a dense chewy cookie, which thankfully A still loved).


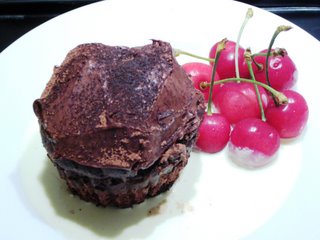
The latest recipe I try is a Double Chocolate Muffin from the Everyday Cooking book I'm so attached to. Originally a Triple Chocolate Muffin (how's that for chocolate overload?!), I leave out the white chocolate chips and chocolate fudge icing the recipe calls for and instead add in freshly chopped dark chocolate with the dark chocolate chips I'm using. I don't have any more chocolate in the fridge to make the icing so I use my beloved Nutino instead. Instant yums!

My Double Chocolate Muffin
(makes 8 - 9)

Ingredients:

150g (1 cup) self-raising flour
50g (1/2 cup) cocoa
90g (1/2 cup) soft brown sugar
165ml (2/3 cup) milk
60g (4 tbsp) butter, melted and cooled
1 egg
90g (1/4 cup) dark chocolate chips and dark chocolate chopped up, mixed
Chocolate fudge icing or Nutino for icing

Method:

Preheat oven to 180'C and line 8 x 125ml (1/2 cup) muffin pans with paper cases.
Sift the flour and cocoa together, then add brown sugar and stir through. Whisk the milk, melted butter and egg together.
Add the wet mix to the dry mix and whisk together until it forms a smooth batter. Fold through the chocolate chips and bits.
Spoon the mix into the prepared muffin tins and bake in the preheated oven for 20 minutes, or until risen and golden brown.
Allow to cool, then top with Nutino frosting or the traditional chocolate fudge icing if desired.


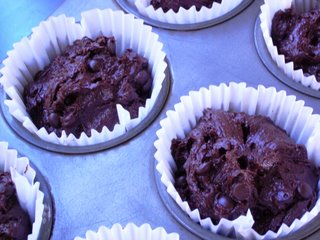
The prepared mix all ready to be bunged into the oven

The muffins before the Nutino icing is spread

These muffins are probably not something you'd want to eat every day, but these are no doubt fantastic once in while!

Check out Oliveria at:

Pran Central Shopping Centre, Shop G36
Corner of Commercial Rd. & Cato St, Prahran
Tel: (03) 9510 0690

Labels: , ,

Wednesday, November 15, 2006

When the Weather Outside is Frightful

It's only a couple of weeks to go till summer rolls around but we're seeing wintry conditions these couple of days here in Melbourne. Since Monday, there have been intermittent showers and cold snaps culminating in a marvellous downpour complete with hailstones today (marvellous for the drought-stricken farming regions in Victoria that is, not so much for this shivering girl typing away with cold feet in booties). The temperature right now, despite the sun peeping out, is hovering somewhere about 8'C so I'm definitely glad to be snug and warm indoors.

Back in Singapore, days like today would be a welcome respite from the sweltering heat and if one is fortunate enough to be snuggling on your couch with a book, definitely an opportune period for doing nothing more than snoozing and reading and perhaps indulging in some pampering treats for the tummy.

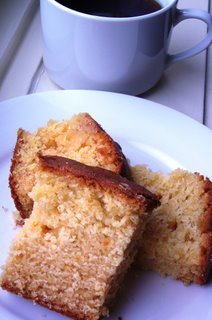
I had earlier in the day started off with a pampering treat (purely by accident since I had made the appointment a while ago) when I went to try the Skin Quench facial at Aesop's South Yarra branch seeing that it was a short 7 minute walk away and was glad to be cosseted with warm oil and wrapped in blankets as the wind howled outside. Of course, the walk back home was enough to take my breath away so after lunch and working on some projects, I decided to treat myself to a cuppa and a couple of slices of the Orange Marmalade Cake I'd made last night.

Not the neatest slices of cake ever but these are so rich, they're better cut into smaller slices to enjoy

Made from a recipe from Campion and Curtis' Everyday Cooking (my favourite cookbook right now), the blurb to the recipe promises that a slice of this cake would be perfect for autumnal afternoons with a pot of tea. I decide today's weather qualifies as vaguely "autumnal" and reach for a couple of slices of that comforting cake. All rich buttery goodness, with a tinge of orange cutting through the richness, it needs only a freshly brewed cup of coffee/tea and a good book (which by luck, I had just bought a copy of "Every Living Thing" by a favourite childhood author, James Herriot).

Orange Marmalade Cake
(Serves 6-8 persons)

Ingredients:

220g soft butter
180g (3/4 cup plus 1 tbsp) caster sugar
Zest of 1 orange, chopped or grated
3 eggs
300g (2 cups) self-raising flour, sifted
60ml (1/4 cup) orange juice
½ cup orange marmalade

Method:

Preheat the oven to 180'C. Butter a 22cm springform cake tin, line the sides and bottom with greaseproof paper and butter lightly.
Cream the butter, caster sugar and orange zest until light and fluffy. Add the eggs, one by one, fully incorporating each one before adding the next. Carefully fold in the flour, along with the orange juice. Finally, fold in the marmalade.
Spoon the mixture into the prepared cake tin and bake in the preheated oven for 40 minutes. Test the cake by inserting a skewer. If it comes out clean, the cake is ready; if it doesn't, cook for a further 5 minutes and test again.

Another perfect treat for today (if I had any left after A took the remaining one to the office this morning) would have been the Jam Donut Muffins I made on the weekend. Bored stiff waiting for A to finish his work so we could go for dinner, I rummaged around in the fridge and scanned Everyday Cooking for a suitable recipe.

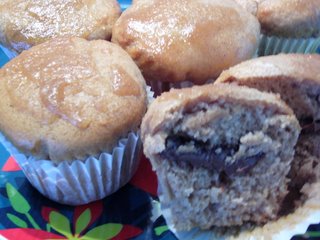
Here's the recipe for Jam Donut Muffins, to which the Campion and Curtis team described as tasting just "like a donut but with only a fraction of the work". A had to ask me to explain many times over why it was called a Jam Donut Muffin but whatever it is called, it sure is a good munch! You can substitute the jam filling with Nutella or in my case, my beloved Nutino

Jam Doughnut Muffins
(Makes 10- 12 muffins)

Ingredients:

250g (12/3 cups) self-raising flour
Pinch of salt
1 tsp ground cinnamon
80ml (1/3 cup) vegetable oil
150g (2/3 cup) caster sugar
1 egg
185ml (3/4 cup) milk
Raspberry jam / Nutino
75g melted butter
150g (2/3 cup) caster sugar, additional
1 tsp ground cinnamon, additional

Method:

Preheat oven to 180'C. Line 10 – 12 x 125ml (1/2 cup) muffin pans with paper cases.
Sift the flour, salt and cinnamon into a large bowl. In a separate bowl, mix the oil, caster sugar, egg and milk together. Add to the flour and stir well until combined.
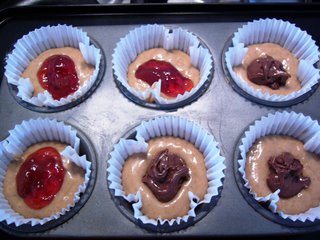
Half-fill the prepared muffin tins with the mixture, add ½ tsp of jam/Nutino to each muffin and cover with more batter. Bake in the preheated oven for 20 minutes or until risen and golden brown.
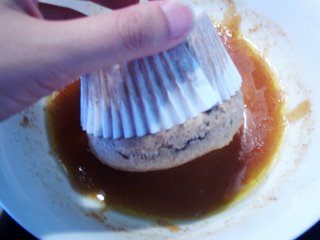
Mix the melted butter, additional caster sugar and cinnamon together. When the muffins are cooked, remove them from the tins and dip their tops into the cinnamon and sugar mix, then place them onto a rack to cool.
You can see how much filling I've stuffed the muffins with!

Dipping the muffins into the cinnamon sugar mixture

Just a suggestion – it's tempting to stuff as much filling as you can past the recommended ½ teaspoon but do so at your own peril. I had half my muffins burst and spill its contents onto the muffin tray because I was overzealous in chucking in at least 1 teaspoon of Nutino or jam!

Labels: , ,

Friday, November 10, 2006

One Day in the Life of a Domestic Goddess (wannabe)

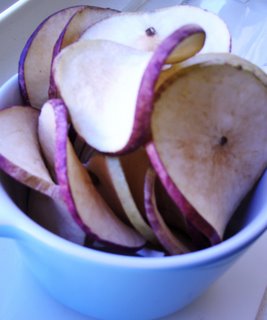
Apple chips from The Nut Spot

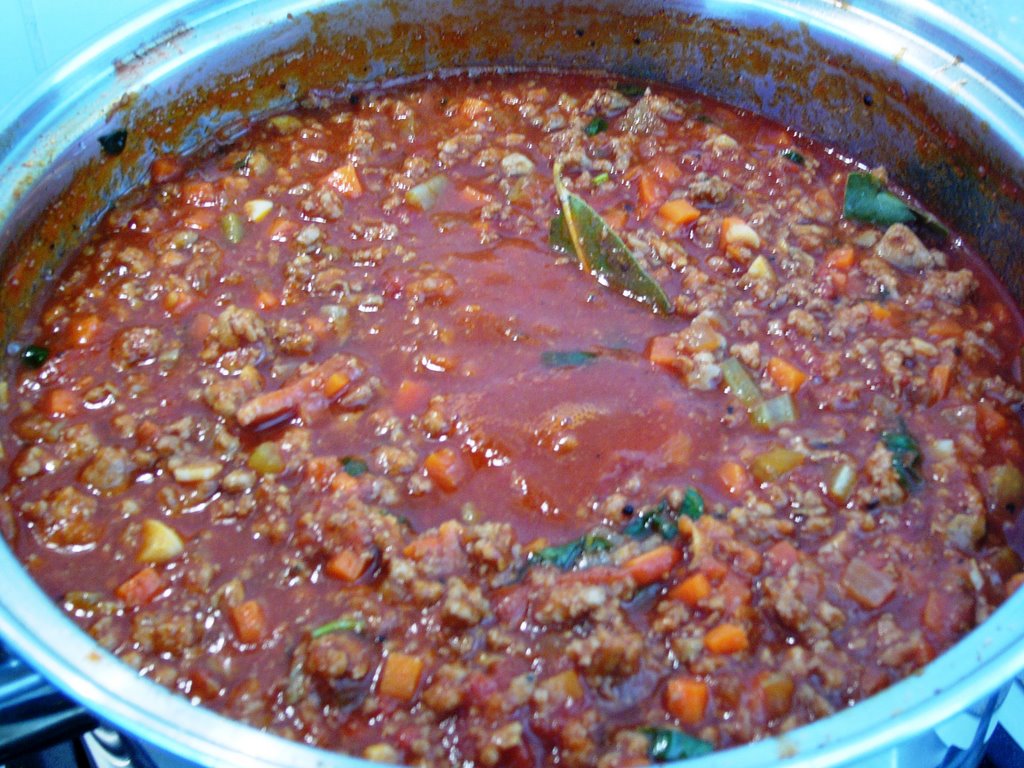
Today is yet another day I thank my lucky stars that I had this opportunity to take time off from the neverending whirl of working life. My time being my own nowadays, a lot of it is spent in the kitchen getting reacquainted with my old lost cooking skills….and as friends now like to note, living out my (secret) fantasy of being a domestic goddess. It's mid afternoon now as I write this, with a bowl of fresh apple chips from The Nut Shot for company, while my ragu sauce bubbles gently away on the stove. What ragu sauce you ask? Well, the ragu sauce I made from scratch just this morning.

In my past hectic life (soon to resume in a not-too-distant January), our fridge used to be a barren landscape of stale bread, milk, an assortment of unexciting jams, butter flecked with bread crumbs, the odd egg or two and usually the remnants of some manky bananas A intended to finish but plain forgot. Packets of frozen vegetables and occasionally, an unidentifiable mess from the back of the freezer complete the picture of our disorganised fridge. I'd throw everything out and troop to the supermarket with best intentions to ensure that both of us enjoy some proper nourishment. The cycle repeats itself every couple of months until I'm reduced to just buying essentials for 1 or 2 home-cooked meals on weekends, and throwing any remaining herbs, vegetable scraps away.

I recall numerous times when I'd open the door and survey the debris inside and despair of the day when I would find the time to ensure that my fridge would always be adequately stocked with pristinely organized foodstuff and fresh produce. Like any woman and her dream wedding, I have a dream fridge. Amongst all the usual fresh produce like eggs, meat, vegetables and fruits, my dream fridge would also have huge compartments to store my condiments, jams and preserves and contain tubs of frozen ragu sauce (for an instant meal), freshly made chicken stock, ice-cubes of frozen herbs (instead of the green sludge mouldering in the vegetable compartment), homemade cookies and cakes to snack on, lots of fresh fruit and bread.


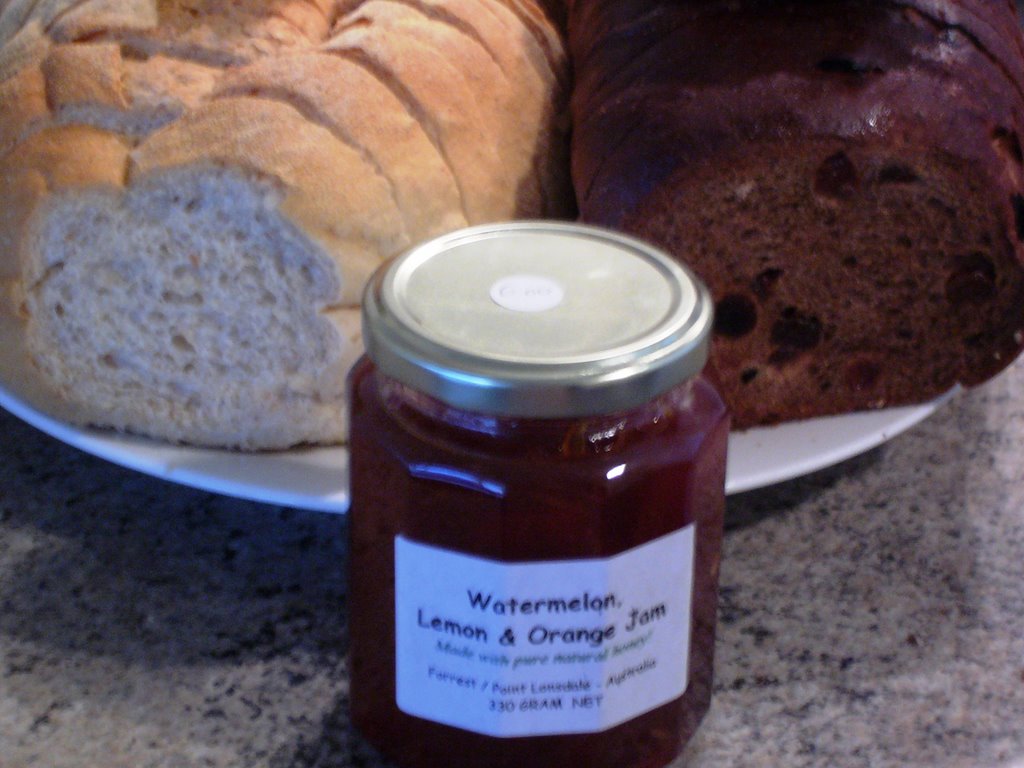
Some of the new additions to my fridge from our recent trip down the Great Ocean
Road - Sourdough (L) and Scottish malt bread (R) from Cobb's Old Style Bakery in Port
Fairy and Watermelon, Lemon & Orange Jam from a market stall in Apollo Bay's farmers' market

Today sees the culmination of several weeks of organized behaviour on my part. Coming across artisanal fresh bread on our last day in Port Fairy (one stop in our trip to the Great Ocean Road), I promptly purchase 2 fat loaves of sourdough and Scottish malt bread from Cobb's Old Style Bakery. A day before that, I'd spotted jars of watermelon, lemon and orange honey jam (an unusual but yummy combination) using fresh honey from a local producer and bought a couple as well. And today, I finally set aside the whole day to make ragu and freeze all my excess herbs. So save for freshly made chicken stock, my fridge is now beginning to resemble my vision of a dream fridge.

For a while, I'd procrastinated on making ragu although it's actually a very simple exercise, as I had an idea that the preparation time involved would simply kill me. However, I'm faced with a leftover ½ bottle of wine (too old to drink), celery and carrots fast approaching its use-by date and decide to bite the bullet. Getting started, it's definitely quite tedious preparing all the ingredients (especially mincing the carrots!!) but once it's on the stove and simmering away, you have 4 hours of uninterrupted bliss.
My ragu recipe combines the best bits of 2 recipes – one from a lawyer friend who apprenticed as a chef on his year out from practice (and does indeed cook some spectacular meals!) and the other from Delia Smith.

Definitely set aside a whole day without interruptions for making ragu. After simmering gently for 4 hours, it's mid to late afternoon if you start first thing in the morning and the ragu has to cool completely before you divide it into separate bags for freezing.

My Ragu Bolognese
(Makes approximately 8 x 225g portions, each portion serving 2 people)

Ingredients:

550g minced beef (I prefer topside mince to lean meat for the extra flavoursome fat)
450g minced pork
225g chicken livers (deveined, green bits cut out and finely chopped)
3 medium-sized white onions, finely diced
8 fat garlic close, chopped
2 carrots, finely diced
2 sticks of celery (fibrous skin removed with a peeler and finely diced)
100g streaky bacon (finely chopped)
2 x 400g tins Italian chopped/whole tomatoes
400g tomato puree/paste
375ml (or ½ bottle) red wine (I used Australian shiraz for its rich and fruity overtones)
Fresh basil, as much as you'd like
3-5 bay leaves
¾ - 1 whole nutmeg, freshly grated
Sea salt and freshly milled black pepper

Method:

(1) Mix the minced meats with 1/3 cup of olive oil, 3 cloves of the chopped garlic and lots of freshly milled black pepper and leave aside while you prepare the rest of the other ingredients.

(2) Take the largest frying pan you have and heat 3 tablespoons of olive oil over high heat. Add the minced meat and brown it, breaking it up and moving it around in the pan. It is probably more manageable if you add the meat a little at a time. When the meat is browned, tip it into a standing flameproof casserole with at least a 3.5l capacity**.

(3) Add more oil and brown the pieces of chicken liver. Add this to the casserole.

(4) Gently fry the onion and remaining garlic over a medium heat for about 10 minutes, moving it around from time to time. When the onion and garlic have softened and turned slightly translucent (about 10 minutes on medium heat), add the bacon and continue cooking for a further 5 minutes.

(5) Now add the diced carrot and celery and fry till soft. If using the casserole, tip all this into the casserole.

(6) Add the contents of the tins of tomatoes, the tomato paste/puree, red wine and a really good seasoning of pepper and nutmeg but no salt yet. Allow this to come up to simmering point. Then strip the leaves from the basil, chop them very finely and add them to the pot.

(7) As soon as everything is simmering, place the casserole on the centre shelf of the oven and leave it to cook slowly, without a lid, for 4 hours. It's a good idea to have a look after 3 hours to make sure all is well, but what you should end up with is a thick concentrated sauce with only a trace of liquid left in it. Once done, remove it from the oven, add a generous scattering of salt, taste to check the seasoning and adjust if necessary. Strip the leaves off the remaining basil, slice finely and stir them in.

** You can also make do with a large heavy-bottomed pot over the stove. At step 4, fry the onion and garlic in the pot instead, and continue the rest of the recipe, except that the meat should be tipped into the pot at step 5 before adding the rest of the ingredients.

Some comments:

I prefer not to salt dishes early on in the cooking process so that I can taste the final flavours to determine how much salt is really required. Heart-smart move! Also, the original Delia Smith recipe called for just ½ whole nutmeg to be grated but with the increased quantities of meat and sauce in this recipe, I increased the amount of nutmeg in proportion.

Starting off with all the prepped ingredients


Setting the ragu to simmer for 4 hours

Midway through the 4 hours simmering process

The end result!

Where I shopped:

The Nut Spot

1c Murphy Street
South Yarra Melbourne
Tel: 9820 9994

Well-stocked with all kinds of nuts, dried fruits and fruit chips. I am glad I don't have to walk miles to get pistachios or walnuts for cakes now!

Cobb's Old Style Bakery

25 Bank Street
Port Fairy, Victoria
Tel: (03) 5568 1713

For a magnificent sticky-sweet Scottish malt loaf and lots of old-fashioned pasties and cakes made the way your grandma does hers.

Labels: , ,

Wednesday, November 08, 2006

Snack Time Munchies

A and I are just back from a long weekend trip down the Great Ocean Road. The long distances between the little towns and sights means many hours in the car before a suitable snack joint turns up to cater to a hunger attack coming out of nowhere. I gave this some thought before we set off as A would be doing most of the driving and I didn't want him to get cranky or distracted, seeing that he likes to snack when he's bordering on being hungry. Also, we'd be covering a lot of ground on Day 1 and wouldn't have time to stop for a proper sit-down lunch, so a picnic lunch was definitely in order.

On Friday evening, I started assembling our picnic lunch for Day 1. I whipped up sandwiches of mashed hardboiled eggs (mixed with chopped celery leaves, chopped onions, a pinch of curry powder and salt, lots of freshly ground black pepper, bound together with a generous lashing of leftover cream in the fridge), packed 2 oranges, 2 slices of the One Pot Chocolate Cake I'd made a couple of days before, and 12 of these yummy cookies I'd baked earlier that evening.

What I loved about these cookies was how simple they were to make and that they didn't have esoteric ingredients which I'd have to hunt high and low for. As I said previously, I'm patient with my cooking but I'm still lazy about attempting those complicated recipes with many different ingredients! If a recipe has 8 to 10 different ingredients for each component (i.e. icing, filling, cake base), my eyes glaze over immediately. Also, I was short on time that evening, so I needed to make a batch of homely comfort food cookies without too much fuss.

It was a good time as any time to try out another recipe I'd flagged in Campion and Curtis' Everyday Cooking, my latest cookbook acquisition. The end results are really good for a simple recipe such as this one. A chomped his way through a couple that Friday night itself and these cookies were much-needed energy boosters on our long walks around the rainforest/wildlife reserve/waterfalls/lighthouses on this trip.

Chocolate Peanut Cookies
(Makes between 25 - 30 chunky cookies)

Ingredients
:

125g soft butter
125g crunchy peanut butter
100g brown sugar, firmly packed
110g caster sugar
1 tsp vanilla extract
1 egg
225g self-raising flour
95g chocolate chips (or as much as you can cram into each cookie dough ball!)

Method:

Preheat oven to 180'C. Line baking trays with baking paper.

Cream the butter, peanut butter, sugars and vanilla together until pale and fluffy. Add the egg and beat until combined.

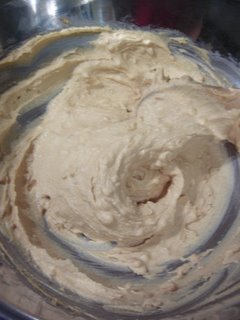
After a lot of muscle work on my part, this is what the creamed mixture should look like.
Add the flour (progressively for a smoother mix) and mix together, then stir in the chocolate chips.

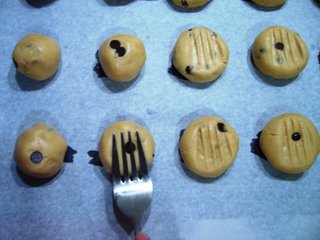
Roll level teaspoons of the mixture into balls and place them 3cm apart on the prepared baking trays. Flatten slightly using a fork.

Flattening the cookie balls with a fork

Bake in the preheated oven for 10 – 12 minutes or until golden brown. Remove from trays and leave to cool on a cooling rack, then store in an airtight container.

The finished product - yummy snack munchies!

Some comments:

  • I used extra chunky peanut butter from Skippy's instead of the normal chunky peanut butter. This was so chunky that there was hardly any "butter" in it; that's why it's been sitting in our fridge for yonks without being spread on toast at all! I've since found out it's perfect for making these cookies.
  • I like to add the flour progressively as 225g is quite a lot to dump in at one go.
    I wasn't so precise with the teaspoon measuring of the dough, but chose instead to just grab whatever I liked. I ended up with chunkier cookies as a result as the balls I rolled were probably much bigger than what the recipe intended.
  • As not everyone is going to be so precise with their measuring of the dough mixture, baking time will therefore need to be adjusted accordingly until the cookies are done. A good test is to check if they are still soft when pressed slightly, bearing in mind that cookies do harden when they cool. If still soft when pressed, bake for further intervals of 1 minute each time until desired shade of golden brown.
  • I like more chocolate chips in mine so I studded most of the balls with a couple more extra chips before popping them in the oven.

Labels: , ,

Thursday, November 02, 2006

Chocolate is a cure....

for days like today.

For the first time in many weeks, Melbourne finally sees rain and quite a fair bit of it too with showers throughout the whole day. With my luck, it's also happens to be the day that I have to traipse around the CBD for class at the Centre for Adult Education.

Today's the first lesson for a course in resin jewellery and sculpture that I signed up for a couple of months ago. I was all excited about producing some beautiful resin bangles and receptacles like those at the expensive but oh so luxe Dinosaur Designs but was disabused of this notion early on in the lesson since we don't actually work with resin until the next lesson. We spend most of our 3 hours discussing how to cast a rubber mold (for the resin), the objects suitable for making a mold (all of my bowls failed our instructor's requirements – there went any thoughts of producing a Dinosaur Design lookalike) and then actually making the rubber mold.

We start first with creating the clay exterior and that alone took me ages and ages and even then, still needed reshaping by the instructor. I forgot to mention earlier that I'm the girl who routinely failed her craft projects in school so when I was handling the sticky stuff, that gave me horrible flashbacks of my ay sculpture that hardened into an unmentionable shape because my patience gave up before I finished it. Then came the mixing of the rubber and the active agent, and the pouring of the rubber from a height in a thin thin stream ("You're pouring too fast!! TOO FAST!!"), which suitably chastened, I managed to get right eventually after several screams of "SLOWER!!" from the teacher. 15 minutes later, my arms are screaming blue murder and I was wondering what I'd signed myself up for.

Strangely enough, I'm not half as impatient when I cook or bake, although I'm still not patient enough to sit with a tiered cake on a lazy susan and pipe elaborate twirls. Maybe it's because most of the time, end products for cooking/baking sessions don't quite take the whole day to emerge (unless you're making a Christmas fruit cake, in which case the whole process probably takes a month before you unearth the cake for consumption). Of course, I do love recipes that produce results in a snap and that's why lazy me had flagged this recipe in Allan Campion and Michelle Curtis' new cookbook "Everyday Cooking" alone for it's title "One-Pot Chocolate Cake". I was quite gratified to realise after finishing that I REALLY only had the pot, the wooden spoon and the springform tin to wash!

I've come across better chocolate cake recipes but this recipe isn't all bad, seeing that it doesn't require an electric beater or food processor (i.e. perfect for me as I have really basic equipment here!) or 12 eggs ("Eve's Chocolate Cake" from Damien Pignolet's "French" which scared me with the thought of cholesterol counting) although it does require 1 whole 250g slab of butter. And it definitely tastes much better with keeping as the recipe promised so you can make it in advance for a party! To cut down on more washing, I skip making chocolate ganache and use my new obsession, Nutino, as a quick icing instead. YUMS!


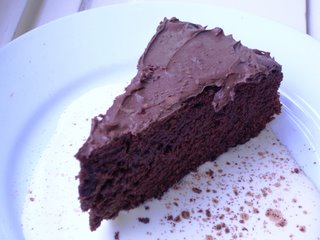
With a splash of thickened cream and sprinkle of cocoa powder (mine looks quite unartistic I know but then again, that's me - the unartistic girl! And apparently sprinkling the powder doesn't quite look the same as using a sift .....), this One-Pot Chocolate Cake does hit the spot after a frazzling morning grappling with goopy materials and getting my new Bonds top clay-streaked.

One-Pot Chocolate Cake
(serves 6-8)

Ingredients

250g soft butter
150g dark chocolate, chopped
220g caster sugar
250ml strong coffee, cooled completely
150g plain flour
100g self raising flour
50g baking cocoa
2 eggs (medium sized weighing about 59g each)

Method

Preheat the oven to 180'C. Butter a 22cm springform cake tin, line the sides and bottom with greaseproof paper and butter lightly.
Place the butter, chocolate, caster sugar and coffee in a large saucepan. Cook over a low heat, stirring occasionally until everything melts. Remove from heat and allow to cool slightly.
Sift the flours and cocoa together and add to the cooled chocolate mixture, along with the eggs. Beat well until all ingredients are combined.
Spoon into the prepared cake tin and bake in the prepared oven for 45 minutes. Test the cake by inserting a skewer. If it comes out clean, the cake is ready; if it doesn't, cook for a further 5 minutes and test again.


Labels: , , ,

Tuesday, October 31, 2006

When you have no time for dinner...

Today, I'm in the midst of drafting minutes for the various meetings I attended last week when the batteries in my digital recorder go flat. Hmm, seemed like a good time as any time to take a walk down to neighbouring Windsor to buy some spices for a new dish I wanted to make for dinner tonight as a treat for A, who's been busy burning the midnight and early morning oil these couple of weeks.

I decide to take the rest of the afternoon off from work to check out a couple of new shops (one is structured much like the Heeren in showcasing up and coming young Melburnian designers), buy some art supplies for my resin jewellery class on Thursday and gather supplies for tonight's dinner and baking sessions for the rest of the week.

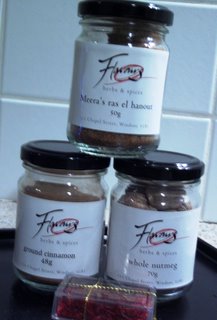
I wander down to a now favourite haunt along Chapel Street called Flavours, Herbs and Spices, which stocks a veritable Aladdin's cave of spices, herbs and spice mixes as well as a host of enticing kitchenware, supplies and linen for the perfect hostess. I'm looking for a Moroccan spice mix, ras-el-hanout, as well as ordinary spices such as ground cinnamon, saffron and nutmeg. FHS' owner, Victoria, suggests "Meera's ras-el-hanout", compounded and mixed specially for local Melburnian chef/culinary teacher, Meera Freeman (who's well known for her Moroccan cooking classes), which comprises a ground mix of cinnamon, cardamom, cassia, allspice, nutmeg, turmeric, long, cubeb and black pepper, coriander, mace, grains of paradise (what is this?) rosebuds and ginger. I quickly spot the rest of the spices I came for and leave with a nice bag of goodies before I start poking around Victoria's lovely shop and buy yet another linen towel/apron from the Mozi range.
My buys from Flavours Herbs Spices

Having the afternoon off also means that I'm like a loony woman back home trying to unpack my stuff in the kitchen, defrost the chicken parts and check my BlackBerry to see if I've received any emails from the office. Darn… the first set of minutes have been formatted and I've got comments on my second set of minutes so it's another couple of hours taking care of everything before I surface to see that it's 815pm!

Time to get on with the spiced chicken with the ras-el-hanout mix and tomato and carrot couscous! Tonight sees a couple of firsts - the first time I'm working with cous cous and the first time I'm doing anything vaguely Moroccan. For some reason, I've never tried Moroccan cooking or even making cous cous although most of their dishes seems easy enough with all that stewing going on. Maybe it was the use of apricots in their dishes which grossed me out a little - me and my compartmentalised taste buds where savoury dishes should be savoury, spicy dishes apropos but a savoury dish with fruity twinges does send a little shiver down my spine. Strangely I don't mind this combination when it comes to pate & terrines though!

Anyway, since I've always been avowedly (as is my Italiano-phile and Franco-phile girlfriend, T) pro-Italian cuisine to date, I've sadly neglected trying dishes from the other side of the Mediterranean. By the end of the evening, I'm wondering why I haven't gone out and purchased a tagine before - cous cous and Moroccan food isn't so difficult and it's definitely tasty! (Alright so maybe my spiced chicken isn't really a Moroccan dish but I used a Moroccan spice mix!)


Tonight's dinner is an exercise in simplicity and makes an appearance in time for A's return around 9pm.


Spiced Chicken

I decide I want crispy chicken for tonight instead of making a stew (too much time!). Toss chicken parts in a plastic bag holding 4 tablespoons of plain flour mixed with 2 tablespoons of ras-el-hanout and a couple of pinches of salt. Once the chicken parts are evenly floured, bung them into a preheated oven of 220'C to crisp the skin for 10 minutes and then lower the temperature to 190'C for about 15 more minutes. Squeeze a lemon over and it's ready to go.

Cous cous

Prepare cous cous enough for 2 persons according to the instructions on the package. Fluff the grains with a fork and toss in a cube of butter and reheat over low heat for 1 minute. Add a handful of shredded carrots, diced tomatoes, the juice of 1 lemon, finely chopped parsley and coriander and some ground black pepper and mix well. Uunfortunately, with the amount I had to carry today, I had completely forgotten to get the coriander and parsley.

**You won't believe the appetizing smells emanating from the spiced chicken when its had its blast in the oven! It looks a little like Colonel Sander's Original Recipe but tastes way way waaaaaayyyyy better. Taking no longer than 45 minutes (prep and cooking time), tonight's dinner is perfect for those nights when you don't have a lot of time to whip up something fancy and yet want something healthy, light but filling.

Labels: , , ,

Monday, October 16, 2006

A Bountiful Harvest

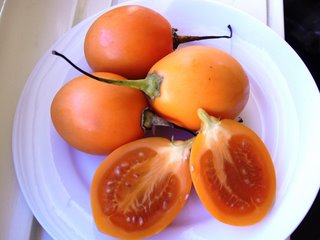
What are "tamarillos"?

That was the question in our minds when shopping at our local grocery mart (a new one on Chapel Street, which is cheaper than Prahran Market). We were browsing the aisles, our favourite way to decide what to buy for a week's worth of dinners, and had spotted these little egg-shaped fruit. Neither of us had tasted a tamarillo, although I vaguely recalled reading about it in The Cook's Companion by Stephanie Alexander, so we bought some to try. Actually, my real reason for buying them was 'cos the tamarillos looked so pretty in their golden-yellow skins. Taste-wise, I thought they might be a little like persimmons.

We also bought punnets of pygmy strawberries, which were the cheapest (high in antioxidant) fruits that day in the market. Much as I wanted some peaches to munch on, I walked on by when I saw that it was going at approximately A$11.99/kilo! No doubt due to the freaky weather Victoria and Australia in general is presently experiencing, in particular the severe drought in rural Victoria which had ruined quite a few harvests, which sent prices of stone fruits (such as plums and peaches) soaring. Just like the banana crop from Queensland I suppose (almost all of the banana harvest was destroyed because of a cyclone and bananas had to be imported, explaining the eye-popping A$12.99/kilo prices in the stores!).

Back home, I flip that useful food encyclopaedia that is The Cook's Companion, a veritable tome of "ingredients and recipes for the Australian kitchen". The way the book is structured is particularly useful as each chapter focuses on a particular food item, which means I can go a little berserk in the markets buying what I fancy and come home to flip the book for a way to turn it into a great dish. It's been really helpful so far when I'm stumped with what to do with celery (the bunches they sell here are the width of Mike Tyson's arm so go figure) other than putting them into stew, pasta sauce and salads, witlof and now tamarillos.

From the Cook's Companion, here is a short excerpt on tamarillos:

"Tamarillos are grown in tropical and subtropical climates throughout the world......A tamarillo tree cops very heavily and can yield 20kg of fruit each year. There is a yellow-organge variety.....as [well as] the crimson. Tamarillos are available from late May to November."

Useful hints on selection, preparation and cooking of tamarillos:

"Ripe tamarillos should be firm but with a slight suppleness. Reject any that are wrinkled. Hard fruit will continue to soften at room temperature, and once they feel right can be refrigerated for a week or two."

"The skin of a tamarillo is never eaten. Peel it away with a vegetable peeler, or treat the fruit like a tomato and make a cross on the pointed end and immerse it in boiling water for 1 minute and then in cold water. The skin will then strip away readily. There is no need to remove the seeds which are edible."

I learn also that tamarillos can be eaten like any other fresh fruit, except perhaps with the addition of some caster sugar on the side or honey drizzled over to soften its tartness. Reading through the recipes, it seems that tamarillo would work well in salsas (one would need to cut down on the vinegar though), in cakes, in chutneys, as a topping in place of passionfruit on the classic Australian dessert pavlova and even baked in a buttered gratin dish.

My favourite recipe though would be perfect for the occasional hot sultry days I am likely to see in the forthcoming weeks in Melbourne. Someone send me an icecream maker and a food processor!! Here is Stephanie Alexander's recipe for Tamarillo Sorbet.

Tamarillo Sorbet (makes 1 litre)

Ingredients:

8 tamarillos, halved lengthwise
2 cups Heavy Sugar Syrup**
½ cinnamon stick (optional)
Juice of 2 limes or 1 lemon

Method:

Using a sharp spoon, carefully spoon out tamarillo flesh, leaving shells intact. Wrap shells in plastic film and freeze.
Put sugar syrup and cinnamon stick, if using, into a non-reactive saucepan and bring to simmering point. Drop in tamarillo flesh and cook gently until tender. Discard cinnamon stick.
Puree fruit and syrup in a blender or food processor, then pass through a coarse strainer over a bowl to extract any hard seeds. Add lime juice to taste.
Refrigerate until cold, then churn in an ice-cream machine according to the manufacturer's instructions.
Scoop sorbet into frozen shells to serve.

** For the Heavy Sugar Syrup, heat 1 part water to 1 part sugar and stir until the sugar has dissolved.

This sorbet becomes a beautiful deep rose-pink. Store any leftover sorbet in an airtight container and use within a few days.

Labels: ,

Thursday, October 05, 2006

Random Thoughts on a Thursday

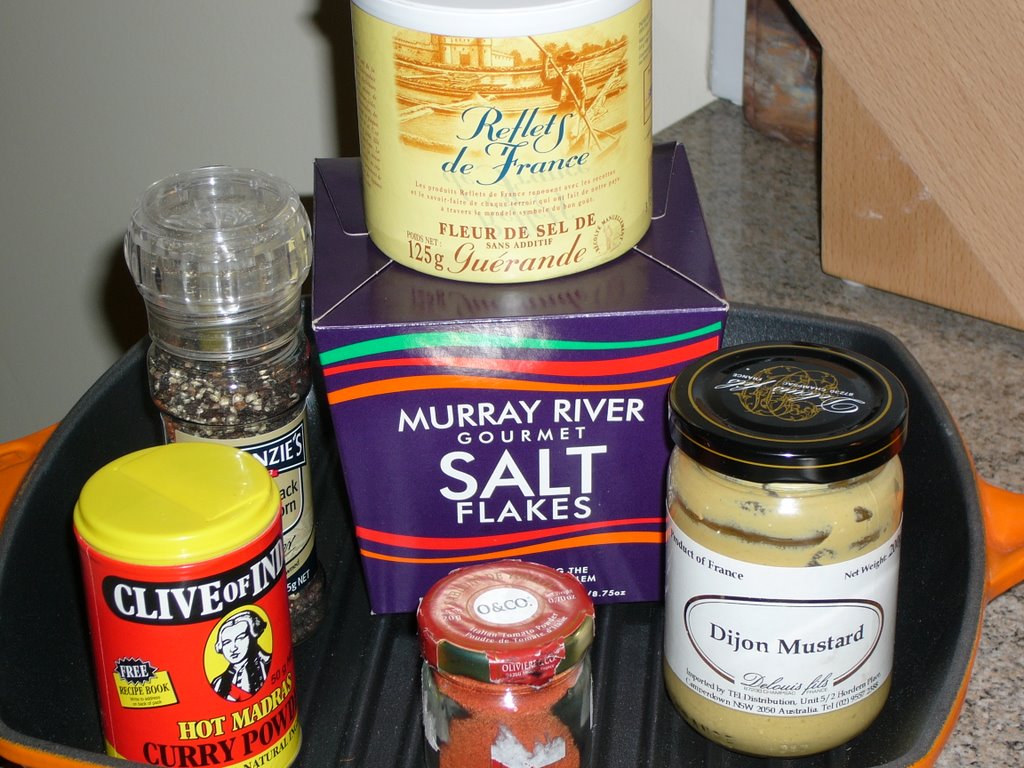
The condiments in my pantry

These are the various condiments I use nearly every day when cooking over here. The latest addition is Poudre de Tomate d'Italie or Italian Tomato Powder from Oliviers & Co, which I discovered in their Bleecker St shop in New York. That's the tiny pot in the photo above. Just a couple of pinches in extra virgin olive oil makes for a nice dip with foccacia, while a teaspoon of the same easily adds some intensity and punch to a Tomato Bean and Bacon Stew.

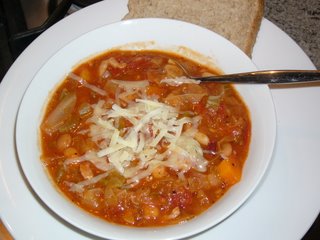
Tomato Bean and Bacon Stew

What with the orgy of eating we had gotten up to over the last 3 weeks, A and I thought to 'detox' our overtaxed systems with some health(ier) eating this week. Much as we both love fine dining and eating out, our secret cravings are often for home-cooked goodness like stews, soups and dishes with lashings of gravy to ladle over rice. Since we're abstaining from carbos this week, I thought this stomach filling dish, chockful of vegetables would be a perfect way to ease back into normal eating patterns after the surfeit of excess we faced in New York.

Full of tomato goodness and tender vegetables, the Tomato Bean and Bacon stew is wonderful on its own with a good slice of wholemeal bread spread with butter and hits the spot on a cold wintry night. Although it's spring now in Melbourne, this is also great for cool nights (remember this is the city with 4 seasons in one day). It is also one of A's favourite dishes. This recipe is from Nigel Slater's Real Cooking with minor modifications:

Tomato Bean and Bacon Stew (serves 4 as a substantial lunch or supper)

Ingredients:

250g/4 large handfuls cannelloni, flageolet or haricot beans (I used half a packet of the Italian style Soup Mix from Mackenzies for a mix of beans and lentils)
Bay leaves
Good olive oil
2 medium sized red onions, chopped (or any sort of onions you have handy)
4 cloves of garlic, chopped
A couple of handfuls of diced fat smoked bacon e.g. pancetta (I use normal streaky or back bacon)
2 sticks of celery, chopped (including the leaves)
2 medium sized carrots, diced (I like carrots in my stews)
2 x medium sized tins (400g) of tomatoes
4 handfuls of spring greens or shredded cabbage
A handful of parsley leaves
Grated Parmesan cheese

Method:

1. Put the beans to cook, with a bay leaf or two and a glug of olive oil and simmer till they are tender. After the first few minutes cooking, skim off the fluffy white scum that rises to the surface. The beans should be ready after 50 minutes simmering. (To expedite the cooking time for beans, you would do well to soak them overnight in plenty of cold water.)
2. Warm a little olive oil in a large, deep pan, enough to cover the bottom comfortably. Add the onions and the garlic and cook over a slow heat until they have softened but not browned. Throw in the bacon, celery and carrots and cook for a couple of minutes till the fat turns golden.
3. Add the tomatoes and their juice, the beans and all of their cooking liquid to cover everything. If insufficient liquid, add some water. Stick a couple more bay leaves in and simmer for 30 minutes.
4. Add the chopped spring greens or shredded cabbage and the parsley leaves and cook for a further 20 minutes.
5. Add a generous lashing of salt and black pepper. Here I add a couple of teaspoons of my tomato powder and let it simmer for a further 5 minutes for the flavours to intensify. When serving, ladle into deep warmed bowls with a drizzle of olive oil and a scattering of Parmesan on each.

Nigel Slater cautions to leave enough for tomorrow and like the classic Italian Ribollitta, this stew tastes even better reheated the next day.

Oliviers & Co

249 Bleecker Street New York

Tel: 646 230 8373

Labels: ,

Wednesday, September 06, 2006

A's Baking Adventures - A Touch of Chocolate

A's been expressing an intention to get his hands dirty in the kitchen for the last couple of years. I rarely take him at his word, except to help me out occasionally with slicing onions, garlic and general prep work. Other than the sole occasion that he cooked his special pasta for me (in our first few months of dating), he hasn't tried his hand at anything else since.

However, after tasting the Sultana Syrup Cake I made a couple of weeks ago and learning that the recipe was really simple, A decided he wanted to have a go at the same over the weekend. I'd also been meaning to do my first post on chocolate for some time and had earmarked a couple of recipes to try. Seeing that A would be doing this for the first time, I decided to leave Damien Pignolet's "Eve's Chocolate Cake" for another occasion and try a simple Molten Chocolate Pudding instead. It would also allow me to finally use the new pot pie dishes I bought from Robert Gordon a couple of weeks back.

We decide the Molten Chocolate Puddings would make a lovely late night dessert and accordingly, we drive over for dinner at a Vietnamese eatery on Victoria Street, Richmond, which we had heard about from A's colleague. We'd been to Bridge Road in Richmond for the outlet shopping a couple of times, as well as for lunch at Richmond Hill Café & Larder and for ramen at Momotaro's but had never headed north to the parallel Victoria Street. Victoria Street is locally known as "Little Vietnam" with Asian grocery stores, butchers and Vietnamese eateries in abundance.

Quan at 88 Victoria Street looked like any of the other restaurants offering Vietnamese/Laotian/Thai cuisine dotting the street. We had been treated the night before to enthusiastic raves about the rice paper rolls, spicy quail and salty squid and duly ordered the same dishes, together with the waiter's recommendation of Beef fried "Thai-style" with chilli and basil. The recommended dish was not only NOT Vietnamese, it catered to the Western palates that frequented the joint. What was finger-licking good however, was the spicy quail, which came in a serving of 2 wing portions dipped in a dark spicy and piquant sauce. The other dishes were tasty enough, but definitely not beating any of the concoctions offered at many of Singapore's zi-char (literally "stir-fry") places. Nevertheless, Quan offered a cheap and cheerful dinner and BYO is available (at an incredible A$0.80 corkage charge a person). We would definitely head back to Victoria Street another weekend to check out all the other offerings.
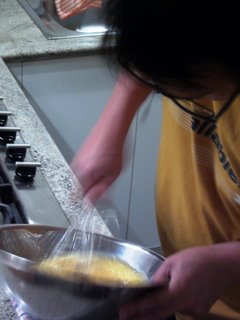
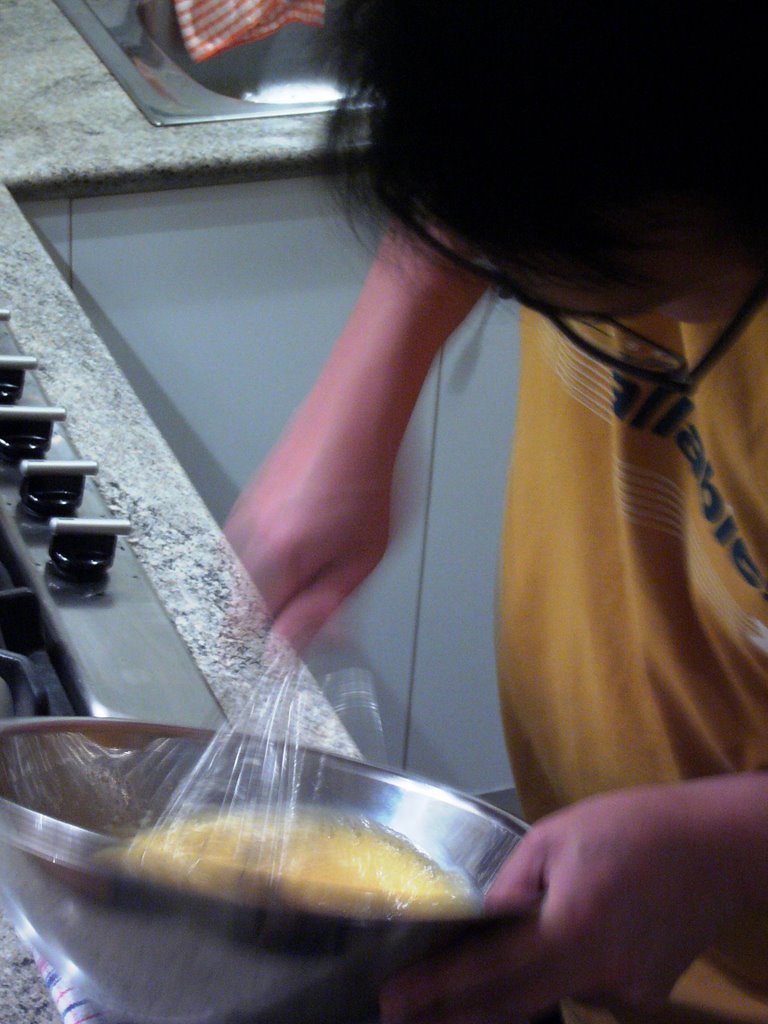
A hard at work whisking the egg yolks with caster sugar


Back to the important bit of this post – A's virgin baking experience. I start him off with the easy bits – greasing the pot pie dishes and melting the chocolate in the bain marie. I show him how to separate the egg yolks from the whites and he decides to try his hand at the last egg. I'm a firm believer in everyone trying their hand once at anything, so I hand over the egg without a bleat. Unfortunately, most of the yolk ends up on the counter and part of it with the other whites as he laments his "strong fingers"! (The eggs aren't wasted though, with the addition of another egg, they form the base of a carbonara sauce for dinner on Sunday night.)
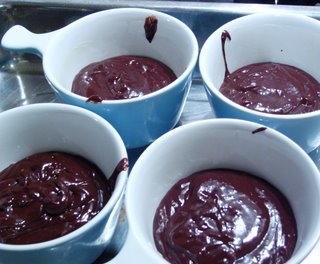

Before....

The recipe for Molten Chocolate Puddings is easy enough and in no time, we've got the pudding ready for the oven. After 15 minutes in the oven, and a generous pouring of thickened cream over, we sat down to enjoy our dessert while watching Bette Middler on "Beaches".

After!

The Molten Chocolate Puddings turn out really well, with spongy sides and the proper molten centre. The recipe provided enough mix for 4 puddings and I put the remaining 2 puddings in the fridge. These are still yummy a couple of days later after heating the microwave (although this meant that the molten centre becomes fully cooked) as the chocolate flavour has become more pronounced. Served with a scoop of caramel icecream, this is an easy dessert to replicate at any of your dinner parties.
The next day after a huge yum cha lunch in Kew with A's colleagues, A attempted the Sultana Syrup Cake and was amazed to find the recipe easy to do (although I had to help him out with certain bits). He's thrilled to bits that he can now bake and I'm pleased that I now have an assistant in the kitchen when I attempt the more complex cakes.

Here's the recipe for Molten Chocolate Puddings, with many thanks again to Donna Hay:

Ingredients
150g dark chocolate - either cooking or eating chocolate is fine
100g unsalted butter
2 eggs
2 extra egg yolks
¼ cup caster sugar
2 tablespoons plain flour, sifted
Thickened cream to serve

1. Preheat the oven to 180'C and lightly grease 4 1-cup capacity ovenproof dishes.
2. Place the chocolate and butter in a bain marie over low heat (or a heatproof bowl set over simmering water that does not touch the bottom of the bowl) and stir until the chocolate is melted and smooth.
3. Place the eggs, extra yolks and sugar in a bowl and whisk until pale.
4. Using a metal spoon, gently fold in the flour and chocolate mixture and spoon into the greased dishes.
5. Bake for 12-15 minutes or until the puddings are puffed. Top with the cream to serve. Sliced strawberries or kiwifruit on the side, optional.

Labels: , ,

Thursday, August 31, 2006

Savoury Pumpkin Scones


A picture of the savoury pumpkin scones as promised!

Labels: ,

The First Time cont'd (Part III)

Having spied a simple recipe for pound cake on the back of the box of Sunbeam sultanas while making the Rustic Apple Tart, I decided to try it one Thursday afternoon. A loves sultanas so I thought it would also be a nice snack for him to take to work the next day. I paid the corner bottle shop a visit for a bottle of white wine and was ready to start once I stepped back into the apartment. Not having any oranges on hand, I decided to tweak the recipe a little taking into account the ingredients I already had in the fridge.

Sultana Syrup Cake

Ingredients:
½ cup Sunbeam Natural Sultanas
1¼ cup self-raising flour
½ cup caster sugar
80g butter, melted
½ cup milk
2 x 70g eggs, lightly beaten [As the eggs I had weighed approximately 59g each (as stated on the box), I compensated for the difference in liquid with slightly more milk and 10g more butter.]

For the syrup:
Juice and zest of 2 oranges [I used the zest and juice of 1 lemon and ¾ cup of orange juice from the packet instead]
½ cup caster sugar
1/3 cup white wine

1. Preheat the oven to 180'C and grease and line a 20cm loaf pan.
2. Place flour, sugar and sultanas in a bowl and make a well in the centre. Add the butter, milk and eggs and mix until well combined. Spoon into the prepared loaf pan and smooth the top. Bake for 45 minutes at 180'C.
3. To make the syrup, place all the ingredients in a saucepan and bring to the boil. Boil uncovered for 5 minutes.
4. Carefully pour ¼ of the syrup over cake while cooling in tin. Leave to soak in and then repeat until ½ the syrup has soaked into the cake. Invert when cold and serve with the remaining syrup.

[As my syrup was quite liquidy to start with, I ended up gently boiling it for much longer and in three stages instead. I also found that it was easier for the cake to absorb the syrup when it was more liquid instead of when it had thickened in consistency. So I boiled it for 5 minutes first and spooned ¼ of the syrup over the cake. I then gently boiled it for a further 5 minutes and spooned another ¼ of the now-thicker syrup over the cake together with the zest, which left a nice shiny glaze. I then simmered the syrup for a further 3 minutes until it was the consistency of pouring honey and served it when cool with the sliced cake.]

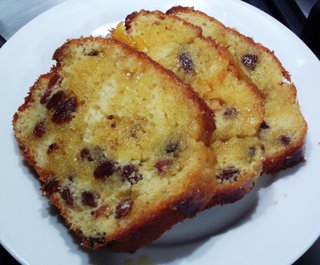
No guesses as to where these 3 slices disappeared to!

It must have been sugar wonderland for A that week, coming home to dinner (sticky chicken wings, sweet potato cakes and cabbage braised in white wine & butter) AND yet another delicious treat. A loves sultanas so he was happily pattering around the kitchen in anticipation of having a slice after dinner, as well as sneaking a couple of bites while my back was turned. Well, all 3 slices in the picture above disappeared by the time we turned in for the night and I packed a further 2 slices, generously drizzled with the syrup, for A's mid-morning snack the next day**. If it's not apparent by now, A really loves his food!

The recipe was simple and quick, taking no longer than 15 minutes preparation and assembly time and the results were really delicious for something so simple. The only further tweak to the recipe above I would make would be to reduce the sugar in the syrup to ¼ cup and a little bit more and have equal proportions of the wine and lemon/orange juice at ½ cup each instead as the syrup turned out tooth-rottingly sweet. A slice or two made for a great afternoon treat the next day with a cup of Earl Grey tea and my latest book, Elizabeth David's French Provincial Cooking.

**A reported that the thought of not having every single bit of the cake to himself (his colleagues apparently likely to pinch bits and pieces of his cake once they hear the rustle of the foil according to him) was so distressing that he had smuggled them to the meeting room during a teleconference with a client and ate them in the course of the conversation. That gave me a good laugh!

Labels: ,

Wednesday, August 30, 2006

The First Time cont'd (Part II)

Scones can be savoury too

A couple of days after making the Rustic Apple Tart, I spied a Donna Hay recipe in the Sunday magazine to the Sunday
Herald-Sun for savoury pumpkin scones and decided to try it out, seeing that pumpkins were easily available and rather cheap in the market compared to other fruit and vegetables. I was also a little intrigued about cooking with pumpkin since pumpkins are not that easily available in Singapore and usually in abnormally large sizes around Halloween in the better supermarkets, so it would be only the second time that I used pumpkin in a recipe.

The original recipe called for a fair amount of shaved parmesan and grated cheddar cheese and chopped bacon for toppings. I tweaked the recipe a little by reducing the amount of cheese and loosing the bacon as I didn't fancy a whole load of cheese and bacon on the scone to detract from the pumpkin flavour. I also added a generous pinch of curry powder to intensify the pumpkin flavour and used a butternut or jacara pumpkin (I forget which) instead of a Japanese pumpkin, that being the only pumpkin available in the local Coles supermarket. The recipe I used with slight tweaks to the original is set out below:

Savoury Pumpkin Scones

Ingredients:
500g pumpkin, peeled and chopped
3½ cups self-raising flour
Sea salt – I used Murray River Salt Flakes
Cracked black pepper – Be generous with the cracked black pepper as it adds a slightly spicy tinge to the scones
¾ cup milk
A generous pinch of curry powder – I used Hot Madras Curry Powder from Clive of India
¼ cup grated cheddar cheese

1. Preheat the oven to 200'C.
2. Bring a large saucepan of water to the boil and steam the pumpkin (in a baking paper-lined bamboo steamer or any other steamer) for 10-12 minutes or until the pumpkin is cooked when tested with a skewer. [I found it easier to mash the pumpkin if it was sufficiently cooked till soft and cooked it for about 20 minutes instead.]
3. Remove the pumpkin from the heat, place in a bowl and mash until smooth. Add the flour, salt and pepper, and curry powder in a large bowl.
4. Make a well in the centre and gradually add the milk, stirring with a butter knife until just combined.
5. Turn out onto a lightly floured surface and knead gently until a smooth dough forms. [I found the mixture a little too wet to turn out and knead sufficiently and lightly kneaded it in the bowl instead.]
6. Press out the dough to form a 20cm x 30cm rectangle. Scatter with the cheese, divide into 12 individual scones and place on an oiled and lined baking tray. [As I hadn't turned it out to knead, I used 2 spoons to form irregular shaped scones on the oiled and lined baking tray. That made for about 13 scones. I then scattered the cheese on top.]
7. Bake for 20 minutes or until cooked through.

The end-result was a little chewier than I expected of a scone but definitely had a similar density to traditional scones (which I've yet to try). A and I enjoyed the savoury pumpkin scones very much that night with the Tomato, Bean and Bacon stew (also another Nigel Slater recipe), especially with a great wodge of butter slowly melting over the side. I also had the scones for breakfast the next day. I found it a great alternative accompaniment to stews/soups instead of ordinary bread, as the pumpkin scones are more substantial than bread. Better yet, I froze the remaining scones for a rainy day when we run out of bread. Simply wrap in cling wrap and store in the freezer.

* Note: I defrosted a couple of the scones for dinner one night and it seemed like the pumpkin flavour had become more pronounced from its sojourn in the freezer. It also mopped up the remnants of the steak juices very well. Definitely convenient to have some of these on hand to satisfy the odd afternoon cravings or for the days when you've discovered the wholemeal loaf has turned moldy!
** Sorry guys but I wasn't able to upload the photos of the scones successfully so will post those in a separate entry next time around.

Labels: ,